Homepage and Other General Information
- Geo Area Designs
- Practice Area Designs
- Site Container Types
Geo Area Designs
Your site homepage may be customized, but generally will contain the following elements:

- A top-level horizontal navigation bar with your primary tool pages. These can be formatted as dropdown menus.
- An mage of your provisioning
- A second-level navigation/featured content section
- A call-to-action button (generally, where users can join the site)
- Note the mobile view of the site
- Containers for dynamically pulling in content or placing a FCKeditor (see the next section for an explanation of these)
- Social media and sponsorship containers
- Access point for the Admin Inbox (only appears to those signed-in as admins)
NOTE: The color scheme of this page may be updated
You also have the option to turn on a configurable Legal Help pop-up .

You may contact PBN HelpDesk at any time to make changes to these configurations or with questions about your custom configuration.
Practice Area Designs
Again, your practice area may be customized (or you may not have any) but generally will contain the following elements:

- Customizable practice area description
- Practice areas navigation bar
- Customieable content tabs to highlight key content
- Content boxes for static content, area host logo and information and additional featured content.
- Note the mobile view of the site
NOTE: The color scheme of this page may be updated
You may contact PBN HelpDesk at any time to make changes to these configurations or with questions about your custom configuration.
Site Container Types
1. FCKeditor Container
FCKeditor containers allow administrators to enter content using a What You See is What You Get (WYSIWYG) interface. Admins can create styled text, upload images and create hyperlinks using FCKeditor's visuals tools. There are four default locations with FCKeditor content on your home page.
To add and manage content in FCKeditor boxes, follow these steps:
- Click the pencil and paper edit icon in the upper left of the box.
- An FCKeditor form will open. Select the Content tab to enter or paste text. Format it using the tool bar menu along the top of the form.
- Alternatively, if you are comfortable with HTML you can select "Source" to add and edit HTML directly.
- Click the Settings tab to enter a title for the box, opt to display or hide the title, and choose whom to display the box to.
- Click Save. Click the close box icon .
- Refresh the page to see your changes.
2. Content Widget Container
Content widget containers automatically draw content headlines from the local website tools, and provide access to substantive content from your home page. They are identified by the RSS icon  and grey cog
 edit icon in their title. The RSS icon is automatically added to tool widgets and when clicked, opens an RSS feed URL for users to add to a web page or subscribe in their news readers.
The screen shot below shows the edit form on tool widgets:
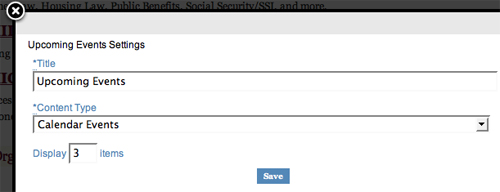
Admins can edit the title of a widget, the type of content to display, and the number of items it generates in its list by following these steps:
- Click the grey cog icon
- The setting pages will display as an overlay.
- Make edits in the Title, Content Type and Display fields.
- Click Save and click the close box icon
 .
. - Refresh your page to see your changes.
- NOTE: If there is no content posted on the Calendar or News tool page, the widget will disapear for site users. It will immediately reappear when current content is available in its respective tool.
3. Enhanced Content Widget Container
The User View of the Enhanced Content Widget
Visitors to the site will be able to view and use the enhanced Content widget depending on how the widget is configured. The section below describes what users will see based on different configurations.
Member View With Areas of Interest Filter Enabled
If the spotlight widget is enabled to pull in content based upon a member’s interest (denoted on their membership form), and the member has selected areas of interest on their membership form, the member will see results that match topics they have expressed interest in.
The widget will display the title(s) of the recently added items and the date the item was added. If set by the admin in the widget, a description excerpt (determined by word count) and location information may also display. Admins may also set the number of resources to be displayed; if more resources than items set to display are pulled-in, then a “View More” link will appear, which will take users to the landing page of the tool being pulled-in to view more resources.
The widget will dynamically update to reflect content that has been associated with the topics/subtopics that have been linked to the appropriate interest(s) noted on the member form, via the backend enhancement. In other words, only content that is of interest to the member will be pulled into the widget.
Member view of Widget when not set to pull in according to interest
If the widget is not enabled to pull in content based upon a member’s interest, then a member will see all recent content, regardless of its topic association.
View of widget to users when not logged-in
Admins have the option to set the widget so that a preview of a resource is displayed in the widget. If this has occurred, then users not logged-in will only see a preview of the resource, and will not be able to view the content detail view via the link in the widget unless they enter their username and password. They will also be unable to “View More.” In addition, the widget will display all new resources added. Only after users have logged-in will the widget update to pull-in interest-specific content. Users not logged-in will NOT see the widget if widget is NOT set to display to non-members.
Member configuration of Enhanced Content Widget
If the member has no interests selected on their profile form, then they will not see any content pulled into the widget if the widget is enabled to pull in content by interest. Members may update their interests on their profile, which will allow them to see resources correlated with their areas of interest pulled into the “What’s New” widget. Members how may do this by clicking on the “My Profile” link on the left sidebar and selecting “Edit My Profile” where they will find their profile form and their selected “Areas of Interest” which can be changed and saved to update.
Customizing Settings for the “What’s New Widget”
As discussed above, administrators have the ability to customize the expansion of the “What’s New” widget, in order to affect whether the widget pulls in content customized by a member’s interest or not. To take advantage of the expanded “What’s New” widget, administrators must first have the widget on their site. If they do not, they may contact support@probono.net or their Pro Bono Net contact to have this configured to their site.
“Filter items on areas of interest” Setting
To configure the widget, administrators may click on the cog icon, which is the Settings tool for the widget. Settings include:
- Widget title
- Which tool to show latest content for
- Number of items to display
- Item description
- Character limit
- Filter items on areas of interest (if applicable)
- Bypass membership check on output
Admins may then enter in the title of the widget, select which tool to show the latest content for, select the number of items to display, the item description, the description character limit, and the location. The new expanded settings give admins the option to filter items on areas of interest, which members select through their profile. Admins can do this by checking the box next to “Filter items on areas of interest (if applicable).” Be sure to save changes by clicking on the “Save” button. As discussed above, if admins do not filter items on areas of interest, then the widget will display ALL new content, not just those resources associated with topics that match members noted areas of interest.
It should be noted that if an admin utilizes this setting, best practice is to make the user aware of this interest filter. This could be reflected somehow in the title of the widget . Alternatively, the widget can be placed on a flex content page that has more information about how the widget works. The following language may be useful: “This widget pulls-in content based on the interests noted in your join form selections. To update this information, edit your profile information.”
“Bypass membership check-in output” Setting
Another setting of the expanded widget is the “Bypass membership check-in output.” If this setting is NOT checked then members will have to sign-in using their username and password in order for the widget to display content filtered by interest. If this feature is checked then users not signed -in will be able to view a preview of ALL resources that are new on the site. However, only the preview version (mentioned above in Section II) will display to users not logged-in.
Settings Tool
There are many options to configure the “What’s New” widget. The settings that admins select (both in the widget settings and in the tool and resource settings) will impact user views of the widget. Below is a chart to help admins navigate how different settings will affect what the user views.
Matrix of Selected Settings and What Users Will See
| Member-logged in: | Areas of interest filtered: | Show content to all users enabled: | Tool (being pulled into widget) user restrictions apply to user: | Content in restricted tool (being pulled into widget marked public: | User View of Widget: |
| Yes | Yes | N/A | Yes | Yes | Content filtered be areas of interest. |
| Yes | Yes | N/A | Yes | No | Will not see content due to tool user restrictions. |
| Yes | No | N/A | No | N/A | View of ALL new content. |
| No | N/A | Yes | Yes | Yes | View of ALL new content in preview mode. |
| No | N/A | Yes | Yes | No | No widget will appear. |
| No | N/A | Yes | No | No | View of ALL new content in preview mode. |
| No | N/A | No | No | No | No widget will appear |
4. Sponsorship/Image Widget Containers
Sponsor widget containers have a grey cog icon in their header bar and they display and rotate logos or images. You can use them to acknowledge or thank organizations that contribute toward your site's creation or continued development, or for any other reason you might want to rotate images on your site. Sponsor/image widgets may be added to the left hand navigation, the center column, or the right side stack of updates and announcements boxes.
See the screen shot below showing the edit form on sponsor widgets:
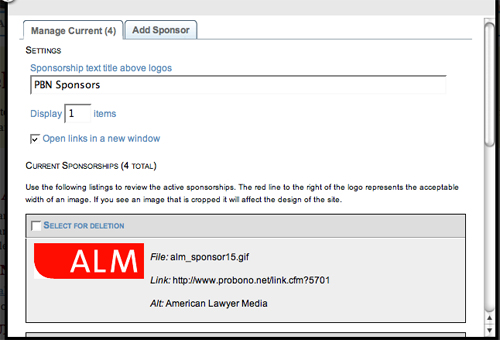
Admins can manage the logos in sponsor/image widgets by following these steps:
- Click the grey cog icon at the upper left. A form will open, with the "Manage Current" tab selected by default. Here you may edit the existing widget's title bar, change the number of logos on display per rotation, and opt whether to open the clicked logo links in a new window.
- Click the Add Image tab if you wish to add logos to the existing set.
- Click Choose File to locate the logo image on your computer's hard drive.
- Enter Alt Text* in the next field.
- Select whether or not to display the title used in the alt text field under the logo.
- Enter a URL for the logo to link to when clicked.
- Click Save, then click the close box icon.
- Refresh your page to see your changes.
* Alt Text is text that appears if a user's browser is set to not display images. It should be a short description of the image (staff photo, MSLA logo, etc.) and never be blank for disability accessibility purposes.
5. RSS Feed Container
An RSS feed container will display headlines from RSS feeds from external websites. Websites with RSS news feeds will have an RSS icon in your browsers toolbar that you can click to view its contents. To add an RSS news feed to your site, copy the address to the feed in your address bar and follow the directions below. For more information about RSS news feeds, check out Pro Bono Net's What is RSS help page.
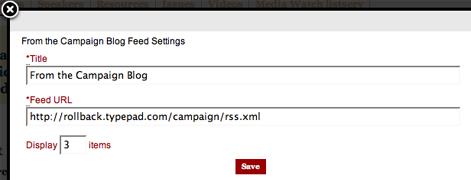
To edit the properties of an RSS Feed box, follow these steps:
- Click the grey cog icon to open the edit form.
- Change the Title, paste the Feed URL and adjust the number of feed items to display.
- Click Save and click the close box icon .
- Refresh your page to see your changes.